
This is part of an occasional photography series. This inaugural post starts at the beginning--;with the basics. Let's walk through simple dos and don'ts of photography.
Don't take pictures from far away. Subjects should fill the frame, not be ants in the distance. In classrooms and at other casual events, move closer slowly. Let subjects get comfortable with you and the camera. They'll be self-conscious at first and then eventually, ignore you. At performances and games, use a longer lens to zoom in on the action.
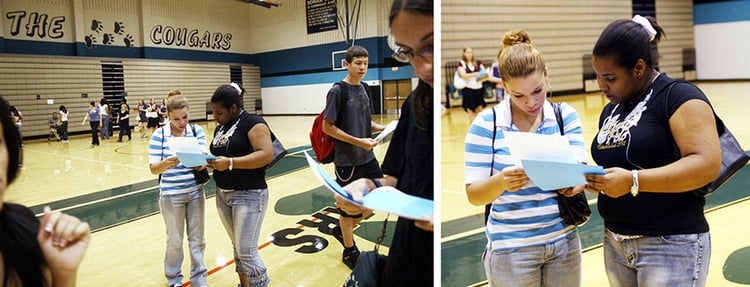 The first photo (left) is too far away, with the background and other students distracting from the intended focus. The second image (right), taken only seconds later, is much better. The photographer has moved closer and zoomed in to make the duo the central focus. Photos by Kel Lemons
Don't photograph people from behind. Photos need faces to create a personal connection with the audience. Avoid shots of backsides and backs of heads. Instead, move for a better view with visible faces. This also goes for side photos when hair obstructs a subject’s face. Move to get a clearer view. (It's okay to ask a subject to move their bangs or hair if necessary.)
Don't chop off body parts. People need their fingers and toes. Don't decapitate a subject or leave them without ankles (especially in sports photos!). Instead, reposition the camera, zoom out or move back a little. It’s okay to crop a little on a subject’s head, but if you get to the temples, you've gone too far. If you are zooming in for a tighter shot, strive for cropping at the waist or at the thighs instead of the knees or ankles.
Don't photograph people looking at the camera. The selfie generation guarantees you'll have subjects mugging for you. Shrug off your annoyance and politely ask the subject to keep doing what they were doing. Most people will acquiesce eventually. (If they don't, move on to someone else.) You'll do a better job of recording the year if you can include as many candid, unposed photos as possible.
THE DOs
Move in closer. Don't be afraid to get close. And then closer. Getting closer with a wide angle usually creates a better photo. If moving closer isn't an option, use a zoom lens to bring the action to you.
Try a different angle. Don't just stand and take a picture. Try different perspectives. Get down low. Kneel for a different angle. Lay on the floor. Stand on a chair or table (ahem, get permission for this one first). Bird's eye and worm's eye views create unusual perspectives that put the scene in a whole different light. Another option--;shoot eye-to-eye with the subject. This creates an intimacy that injects a more personal connection.
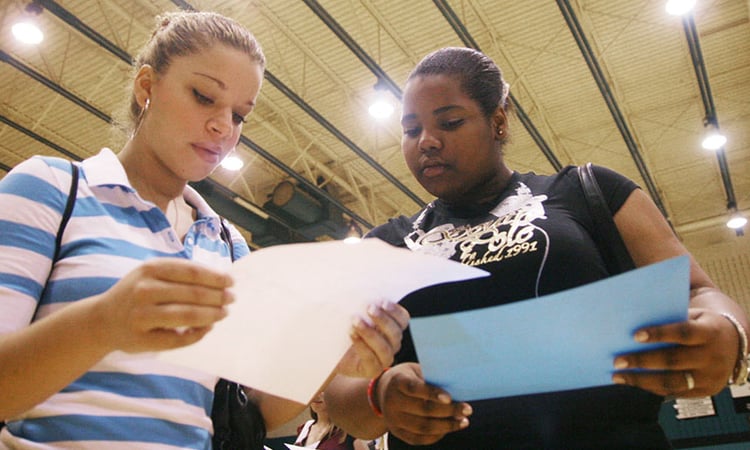 The same scene earlier has a radically different look by taking a low approach and photographing up on the subjects. Photo by Kel Lemons
Look for reactions. Once a play is over, sports photographers often want to check they got the shot. But it will still be on the memory card in a few minutes. It's better to stick with the player and watch the reaction to the big play.
In classrooms, emotions can make the difference from a flat photo to a compelling one. Watch lab students’ faces as they slice open rats, frogs and sheep hearts. Capture concentration and frustration during scavenger hunts and math computations. The same goes for student life and club coverage. Photograph delight at club parties and pep rallies. Show determination and focus with volunteer activities and music practices.
Having an eye for photography makes a big difference in how your photos look. But even if you don't have that talent, you can take better photos by following these simple guidelines.
